Post by Sabertooth on Nov 4, 2018 14:24:59 GMT -5
On all my images, the red arrows indicate points with clips. You'll need basic tools for removing the wheels
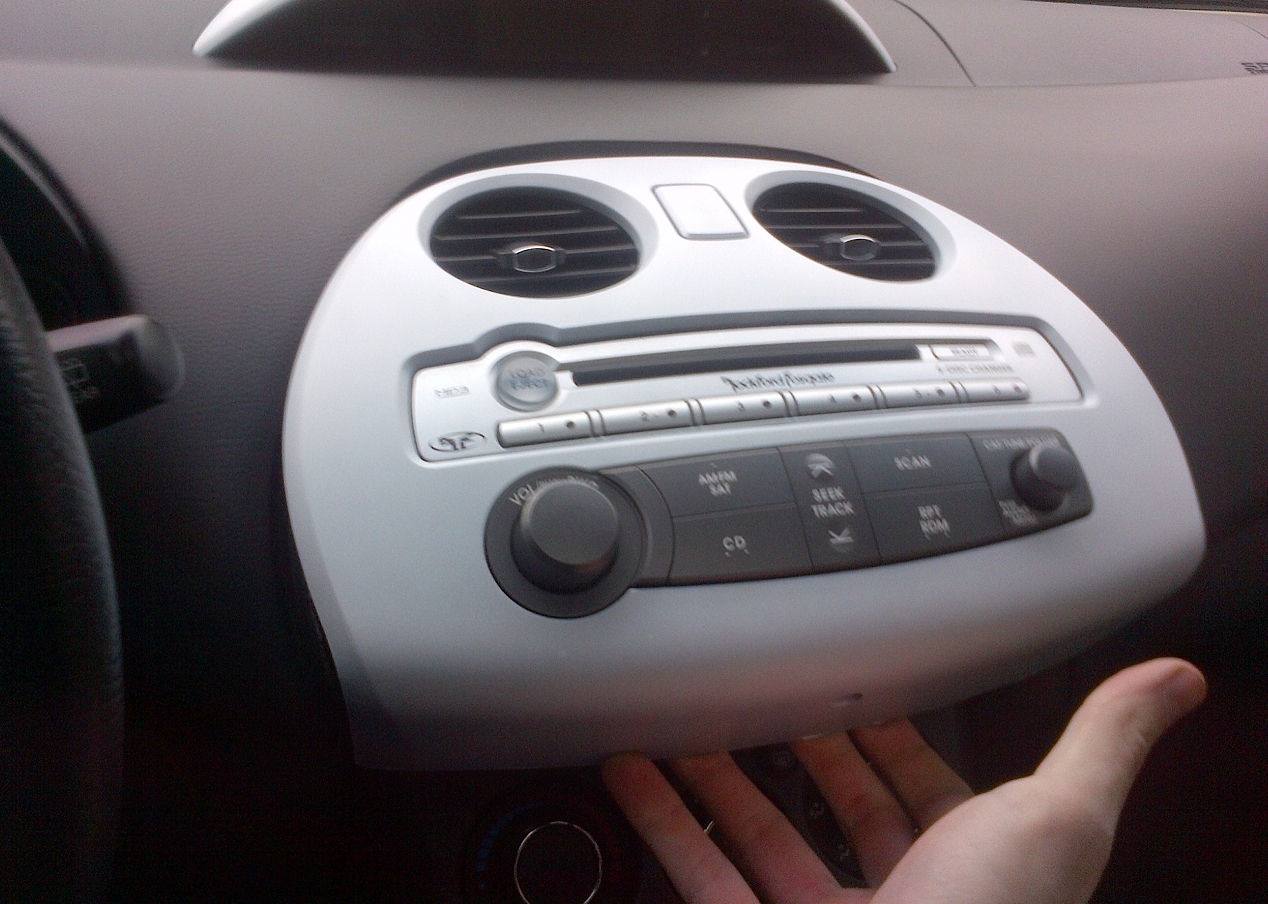
Step 1, remove the radio faceplate. Grab it at the bottom and gently pull straight back. The bottom will disconnect fairly easily, the you can rock it for the top to come loose. Do not pull the faceplate straight back, as there is a wire for our 4 ways on the back
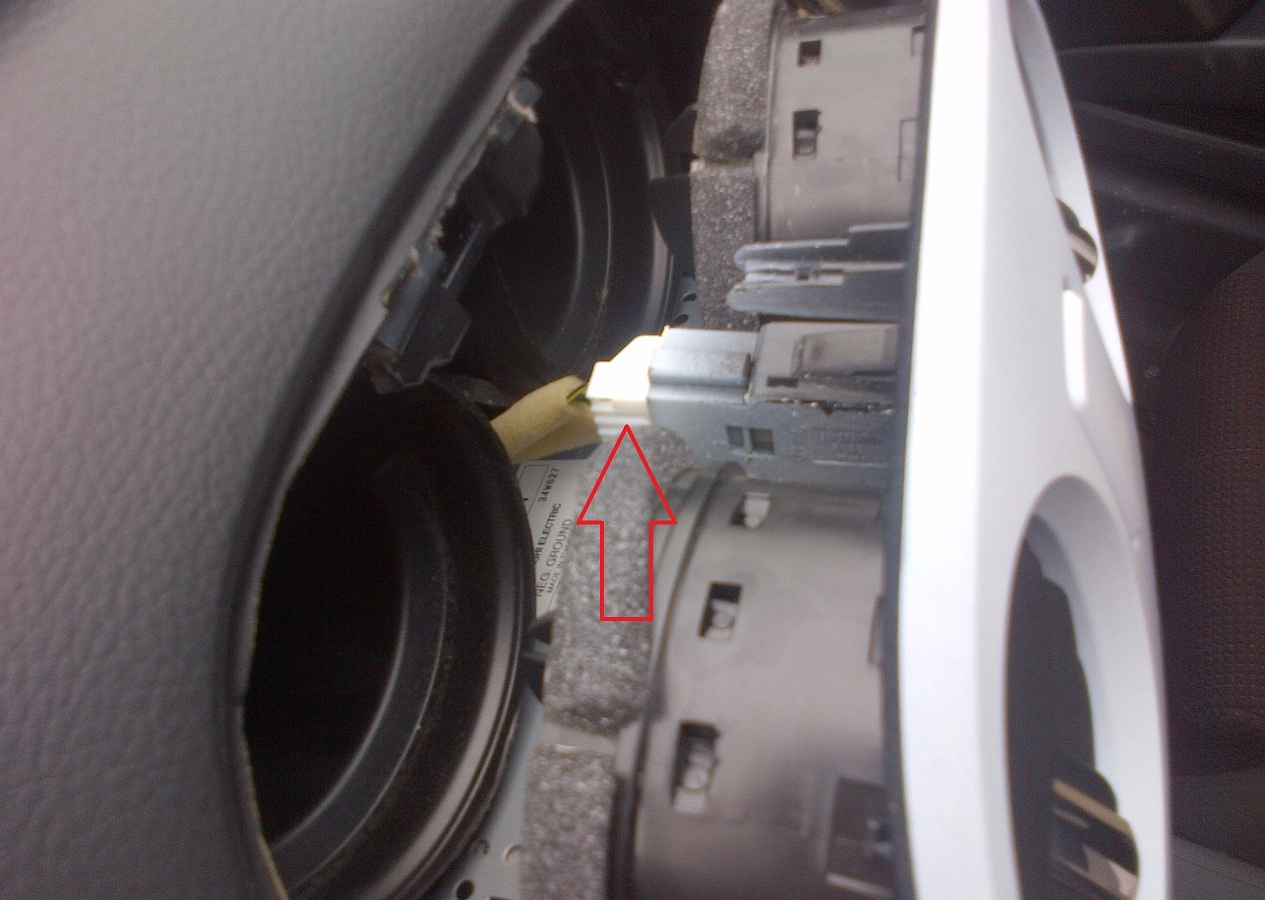
Gently unplug the wire
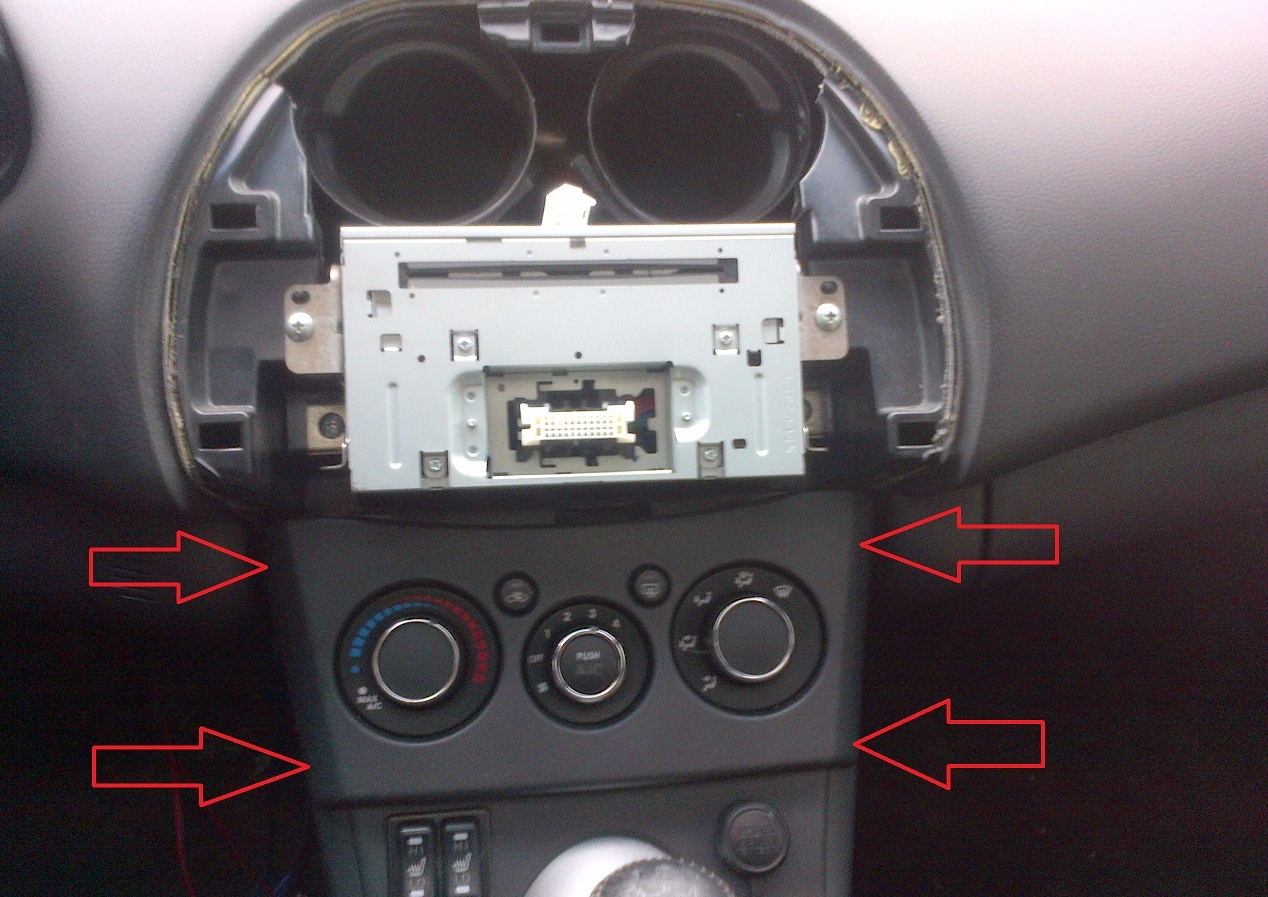
Step 2, remove the plate with the climate control. The order I find easiest is top left, bottom left, top right, bottom right. You can disconnect the wires in behind, but I suggest just gently ignoring the plate and letting it hang as those wires are a pain, and it's not really in the way anyhow
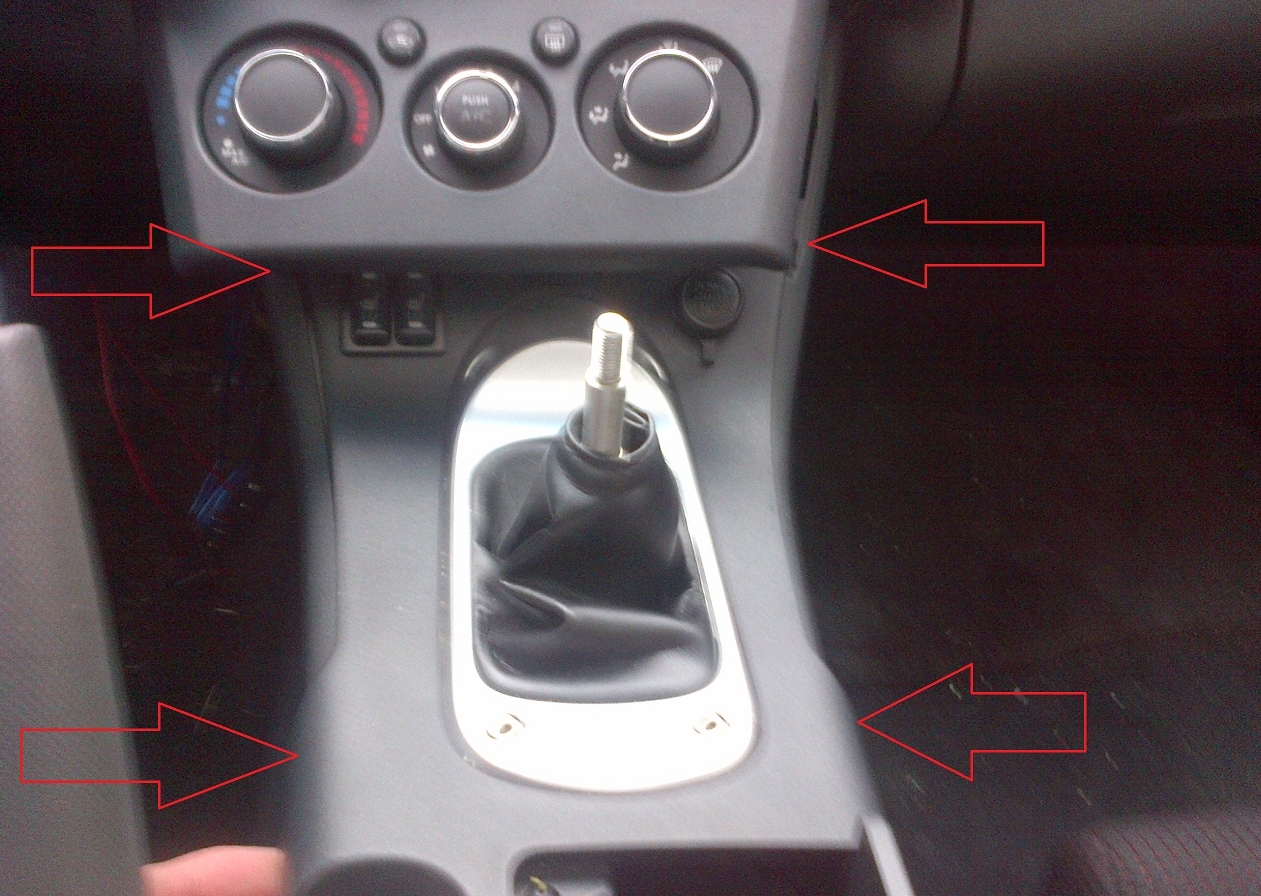
Step 3, with the climate control plate removed you can now remove the panel with your gear shifter on it. The top 2 clips are easiest to remove by pushing straight on the holes, and then pulling the side paneling away. No risk of snapping the clips that way
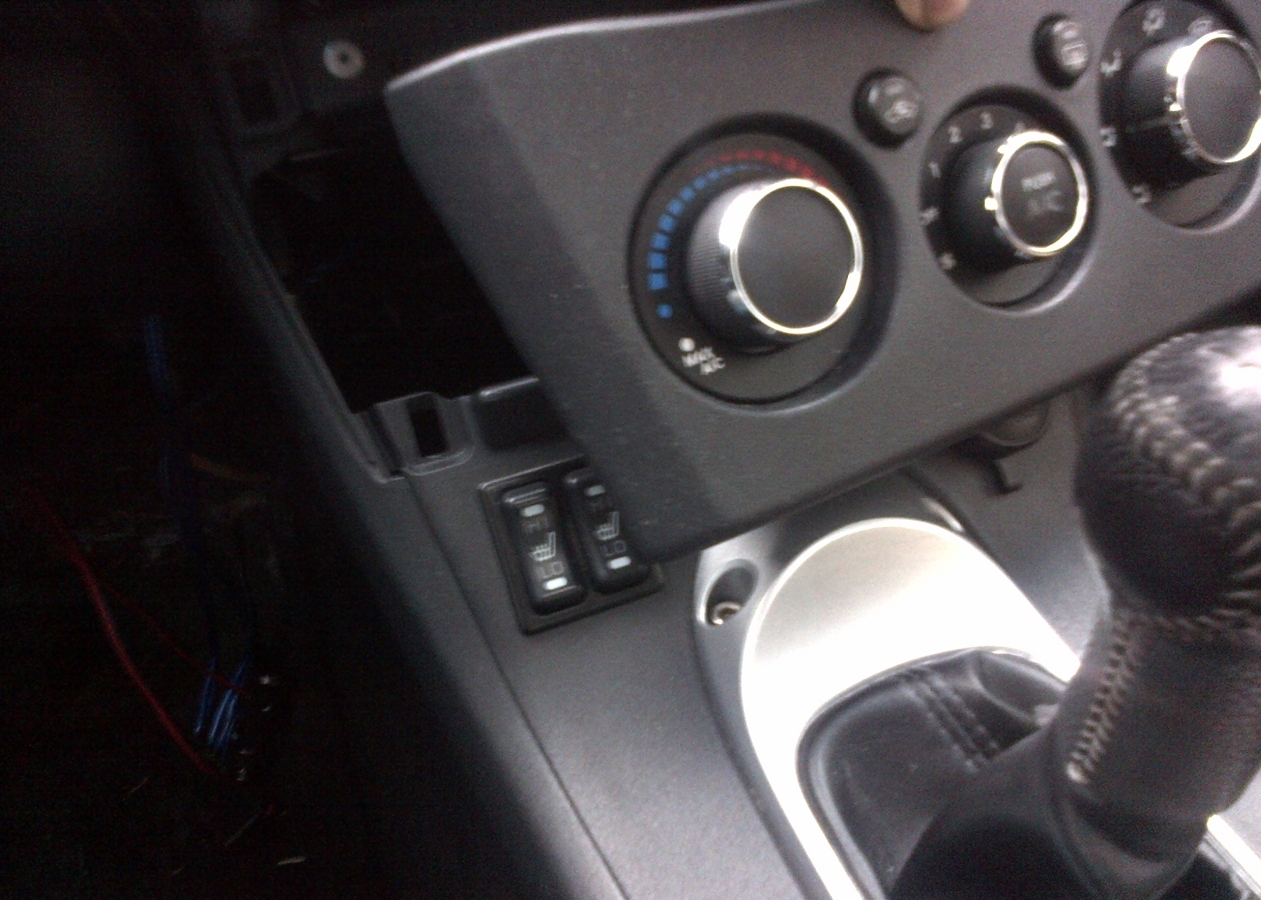
The clips farther back (bottom of picture) are easy, just pull outward gently from underneath. Now is a good time to remove the gear shift knob if you haven't already
Pull the handbrake back as far as you can, and lift the panel straight up with the door to the storage box open. The panel will come out without much issue
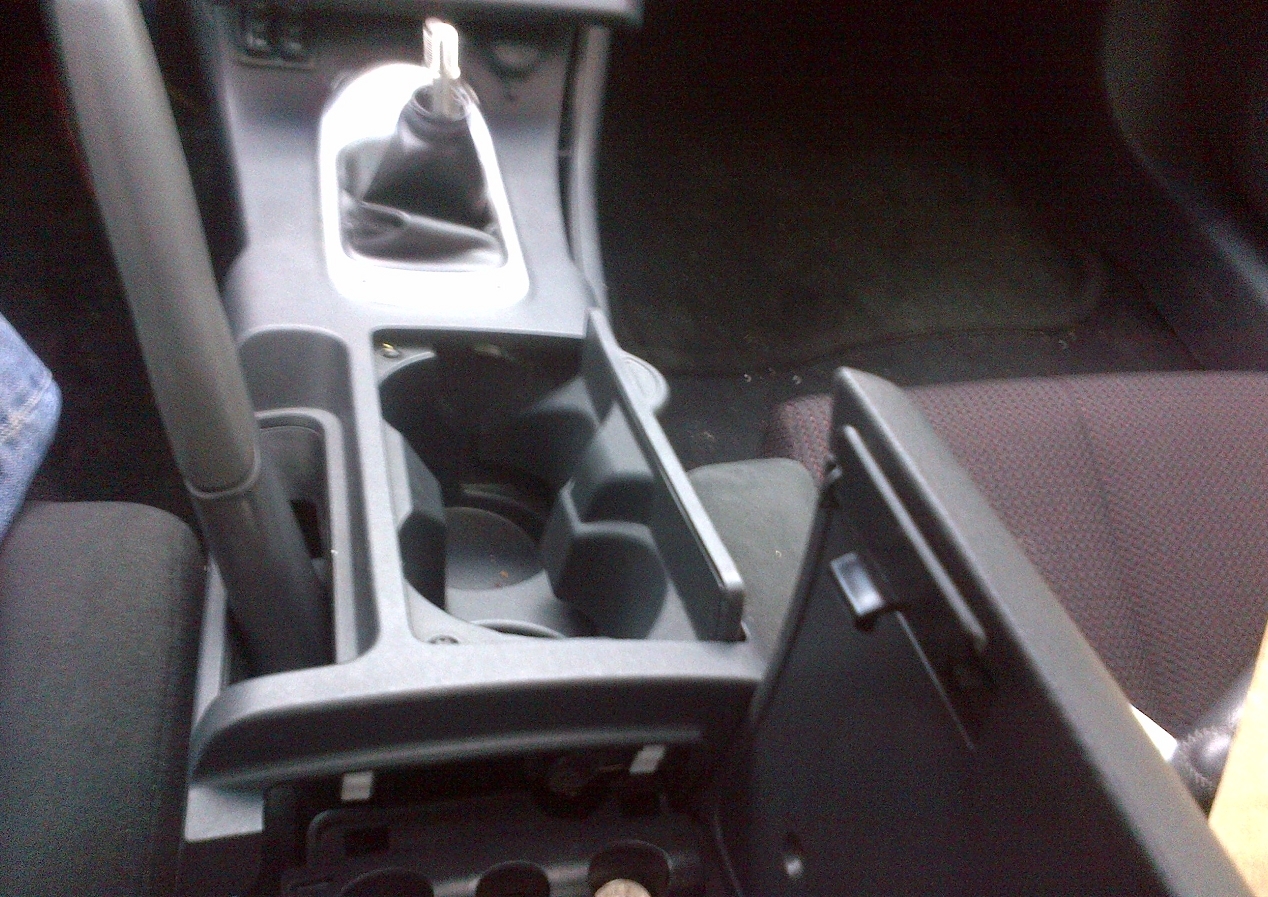
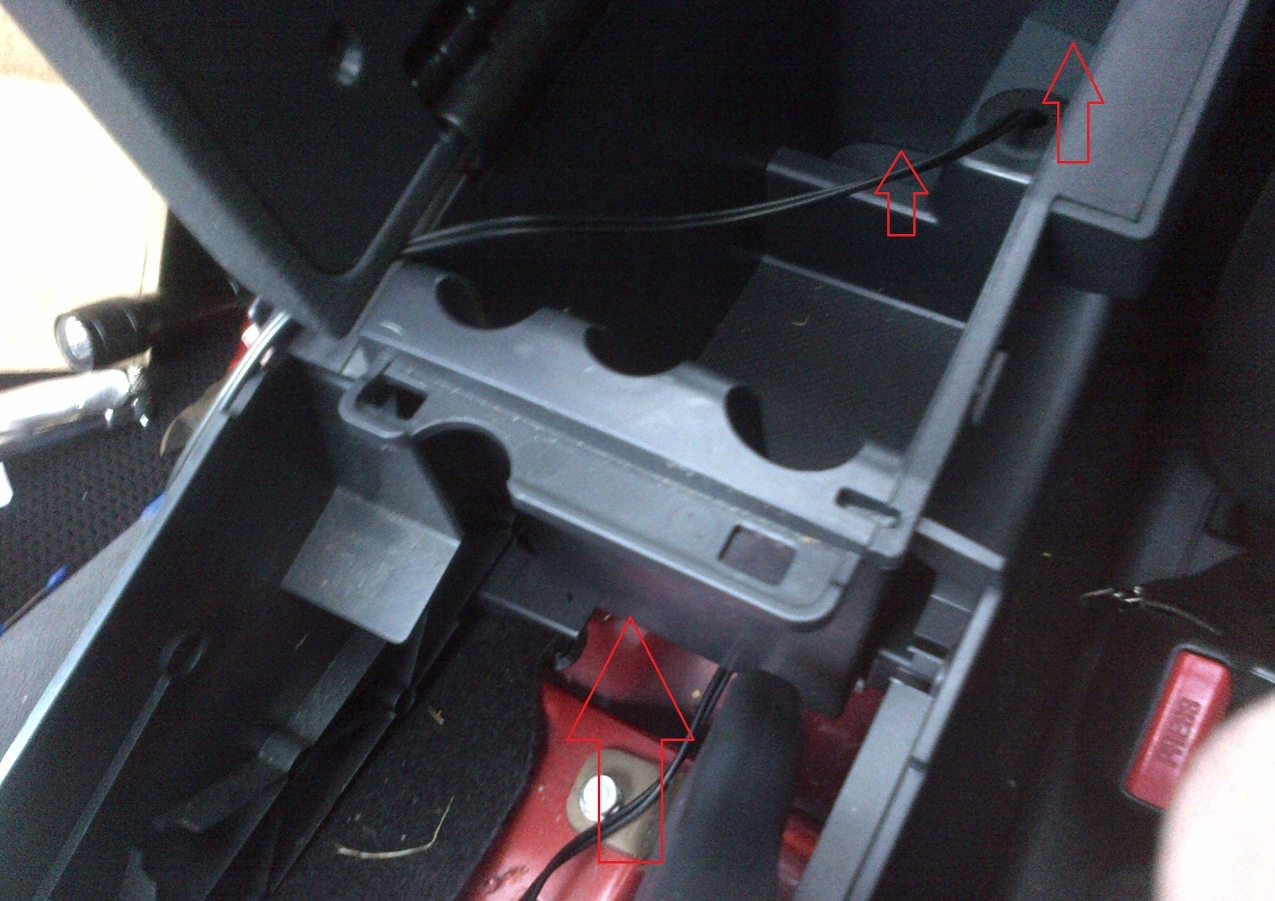
Step 4, remove your change from the change holder if you have any there. As you can see, I dropped a nickel and had to go fishing. Once done, reach your hand under the floor to the storage box (lower arrow) and press straight up. The floor will pop up, move it aside but do not remove it. There are wires connected to either your power outlet, or just stuck to the bottom if you have a GS (I ran my aux cable through the spot). The upper arrows are clips of minimal annoyance. They don't do much once the floor is up
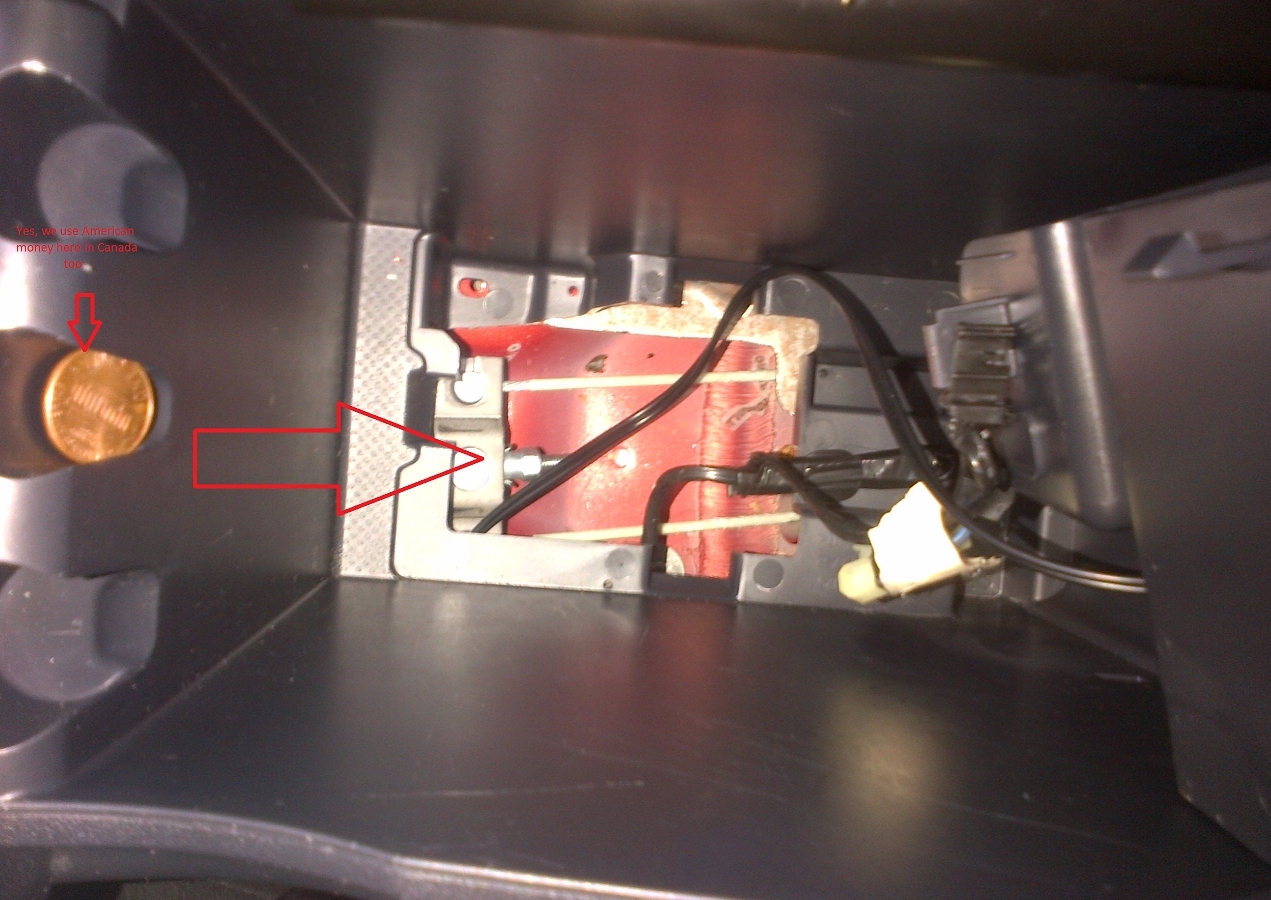
Step 5, with the handbrake disengaged turn the nut shown by the arrow. It's likely already loose, but loosen it off so there is slack.
Step 6: Remove your rear wheels and remove the rubber caps from the brake rotor face
Step 7: Rotate the drum so the opening is to the bottom, and with a flat head screwdriver, rotate the adjusters inside the drum through the holes
Step 8: Tighten the handbrake cable nut until it takes only 3-7 clicks to lock the rear wheels
Step 9, re-assemble and enjoy being able to park on hills again
Step 1, remove the radio faceplate. Grab it at the bottom and gently pull straight back. The bottom will disconnect fairly easily, the you can rock it for the top to come loose. Do not pull the faceplate straight back, as there is a wire for our 4 ways on the back

Gently unplug the wire

Step 2, remove the plate with the climate control. The order I find easiest is top left, bottom left, top right, bottom right. You can disconnect the wires in behind, but I suggest just gently ignoring the plate and letting it hang as those wires are a pain, and it's not really in the way anyhow

Step 3, with the climate control plate removed you can now remove the panel with your gear shifter on it. The top 2 clips are easiest to remove by pushing straight on the holes, and then pulling the side paneling away. No risk of snapping the clips that way

The clips farther back (bottom of picture) are easy, just pull outward gently from underneath. Now is a good time to remove the gear shift knob if you haven't already

Pull the handbrake back as far as you can, and lift the panel straight up with the door to the storage box open. The panel will come out without much issue

Step 4, remove your change from the change holder if you have any there. As you can see, I dropped a nickel and had to go fishing. Once done, reach your hand under the floor to the storage box (lower arrow) and press straight up. The floor will pop up, move it aside but do not remove it. There are wires connected to either your power outlet, or just stuck to the bottom if you have a GS (I ran my aux cable through the spot). The upper arrows are clips of minimal annoyance. They don't do much once the floor is up

Step 5, with the handbrake disengaged turn the nut shown by the arrow. It's likely already loose, but loosen it off so there is slack.

Step 6: Remove your rear wheels and remove the rubber caps from the brake rotor face
Step 7: Rotate the drum so the opening is to the bottom, and with a flat head screwdriver, rotate the adjusters inside the drum through the holes
Step 8: Tighten the handbrake cable nut until it takes only 3-7 clicks to lock the rear wheels
Step 9, re-assemble and enjoy being able to park on hills again

