Post by Sabertooth on Mar 30, 2020 10:54:49 GMT -5
This guide isn't the most picture heavy, I never intended to make a guide up, but figured it was easy enough to do, so it would work from words
Preface:
Why should you do this mod:
Larger brakes have more mass, and wider rotors have more cooling ability. If you find that the OEM brakes are overheating on the track, and it's NOT because of decade old DOT3 fluid boiling or low heat ceramic/organic pads being used, this is the mod for you. Alternatively, if you're willing to lose some performace in order to not have to change from ceramic pads to metallic for light track use, this will give you some extra braking ability as the brakes will take longer to heat up, and will cool much faster than OEM, especially for a GS
For a GS, this will add 10mm thickness and 20mm diameter to the front rotors, and 14mm thickness, 40mm diameter to the rear. This also converts the rears from solid rotors to vented rotors, resulting in significant cooling increases (as they have no cooling veins from the factory at all). GT will see slightly less gains from this, but will still see a significant jump
Why this mod may not be right for you:
If you're not tracking the car, you won't be at a point where this mod is worth the money, or the performance losses. Larger rotors add more unsprung rotational mass, which will stress your suspension and driveline components more, as well as will reduce the amount of horsepower you put down at the wheels. If you're fading your stock brake son the streets, you should probably cut back on your street racing. If you're not street racing, consider investing into non eBay rotors, and some good pads, and fix your brake issues. You may have a bad brake booster or severely swelled brake hoses. Stock brakes in good shape should be able to lock up the wheels at the end of the 1/4 mile without issue, and I have been able to at 180km/h at the track.
Advice on choosing your new pads/rotors:
-Be honest with yourself. If you're not gonna go to the track, you don't need carbon metallic pads. Everything that adds performance in this area typically takes away from comfort and safety on the streets, with a few exceptions.
-High heat rated pads usually don't work well until they see high heat, and typically make a lot of noise. Typically, these are very hard on rotors. I bought myself a set of ceramic for the streets, and carbon metallic for track days because of that.
-High heat rated rotors (high carbon) are a nice addition, but typically cost more. They provide higher thermal capacity (work longer under stress) and are more resistant to warping/cracking.
-Slotted rotors are a nice aesthetic touch. It's possible there's a tiny gain here through the Leidenfrost effect, where a layer of steam may develop at the brake pad, and the steam may reduce heat transfer between the pads and rotors, resulting in reduced braking ability. I don't have a definitive answer, but do know that gasses can be compressed, and there is a LOT of force involved on brake pads contacting the rotor. Some also argue it allows for a spot for liquid water to be wiped away, which again is plausible, but as the pad engages the surface, it too is wiping the water away. I opted for solid rotors, as they can be re-surfaced.
-Drilled rotors are not a benefit if you're looking to upgrade your brakes unless your brakes are oversized. This is the one rare spot where I'd suggest them for the streets. By having less mass and pad surface area, they will heat up faster, and clamp harder. This will get your pads up to temperature quicker, and will allow for the most consistent and predictable street braking. This is why drilled make so many appearances on entry level "performance" brakes, as they do in fact feel like they grab harder, because at first, they do. But if you're doing this mod, it's a lot of money to be spending to not gain anything but fill the rims with a beefier rotor. Issues in performance use are everything that makes them good for the streets. They heat up fast due to lower thermal capacity, and will begin to fade sooner. The holes also take away air velocity from the cooling veins, reducing cooling of the rotor. On top of that, it's very common to see cracks form in drilled rotors of any quality from the drilled holes, and they often will connect to each other. The reason is that they create a lower stress point, and as the metals expand and contract, it's the path of least resistance for a fracture to travel along the grain to. Running ceramic pads on a street car, you probably won't have this issue. Running anything high heat rated on the track, you'd best stay away from them and go either slotted or full face. You don't see many competition cars running drilled rotors without a specific purpose (usually in tuning the rotors for the specific track. Eg, one with a lot of cooling time between hard braking could use the reduced heat capacity in order to have a harder engagement when needed, but driven right may never overheat the brakes. These are also cars that at the end of a race session put on new rotors, however, so keep budgets of high end race teams vs your budget in mind, and decide from there). I ran these on the street without issue on ceramic pads. They only saw minimal abuse at the track, but were very prone to smoking the pads (overheating quickly) on hard braking
Alright, onto the installation.
Step 1a:
Assemble your brake calipers if they aren't already
The calipers are 2 pieces. I re-assembled mine with new seals, pistons, and dust covers. Be sure everything is clean, and use a lot of brake lubricant. You do not want to scratch the sides, as you may cause leaks, or to pull the seal inside out.
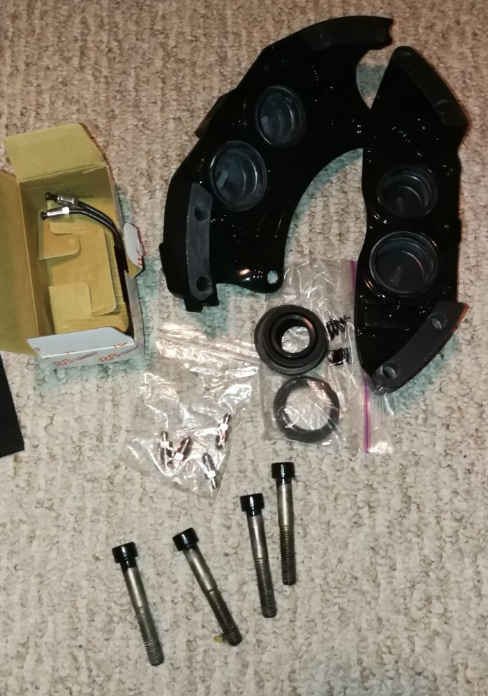
Connect the two halves of the caliper together, and connect your crossover line. Be sure to pay attention so that one caliper is built for each side with the crossover line on the bottom. These use 10mm fittings, and are a pipe thread. They will seal themselves once tight.
Apply your bleed nipples. They must be at the top, or else you can't bleed out air.
Place your brake pads in place, and connect them with the first pin. Then, place the separator under that pin, spreading the pads apart. You'll have to bend the separator down, and then place your second pin. I didn't take a picture of it, so here's a random one from evolutionm
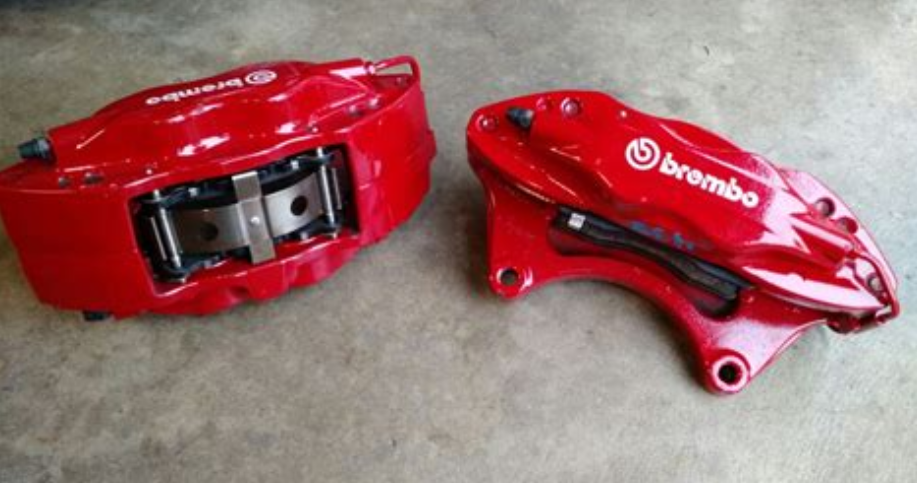
The calipers are now ready to go on.
Step 1b:
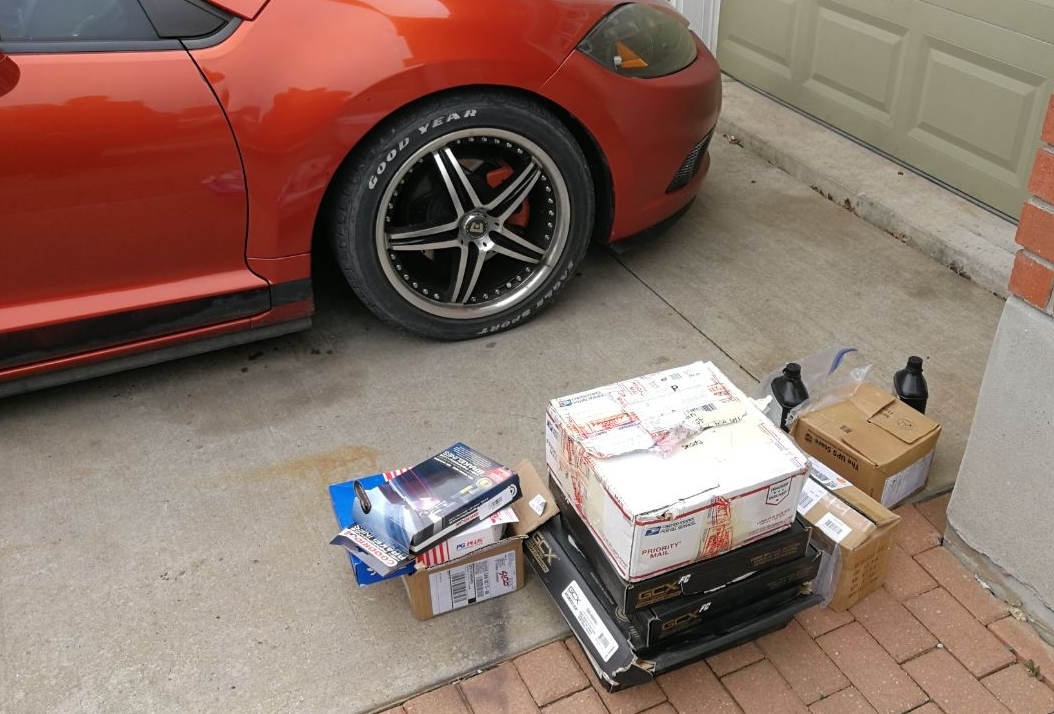
Gather your materials
Calipers (front and rear)
Evo caliper bolts (front and rear)
Brake Pads
Brake Rotors
Wheel spacers (depending on your rims, not just offset. Mine are +45, 18*8.5", and still cleared)
Brake fluid (DOT 3, 4, or 5.1, these can be mixed, and are made from the same things. Do NOT use DOT 5, it's silicone based, and will ruin your ABS and you will probably crash from a brake failure)
Step 2:
Remove your wheels
Step 3:
Remove the factory brake calipers. You'll undo the slide pins at both the top and bottom of the caliper, remove it, then remove the caliper bracket, and the brake rotor.
You can undo the caliper at this point at the brake line. It's a 12 or 14mm headed banjo bolt, be sure to not lose the 2 crush washers (one per side of the brake hose fitting). Optimally, you'd use fresh ones. Leave the line hanging upwards so the brake lines don't fully drain.
You will NOT be needing any of the hardware from the front calipers.
Step 4:
Place the new rotor on, and bolt the caliper in place. The caliper will bolt in using the same holes the OEM caliper bracket did, but you will need to use the two Evo caliper bolts.
Connect the brake hose, and tighten everything up. It should be on, and ready to be bled.
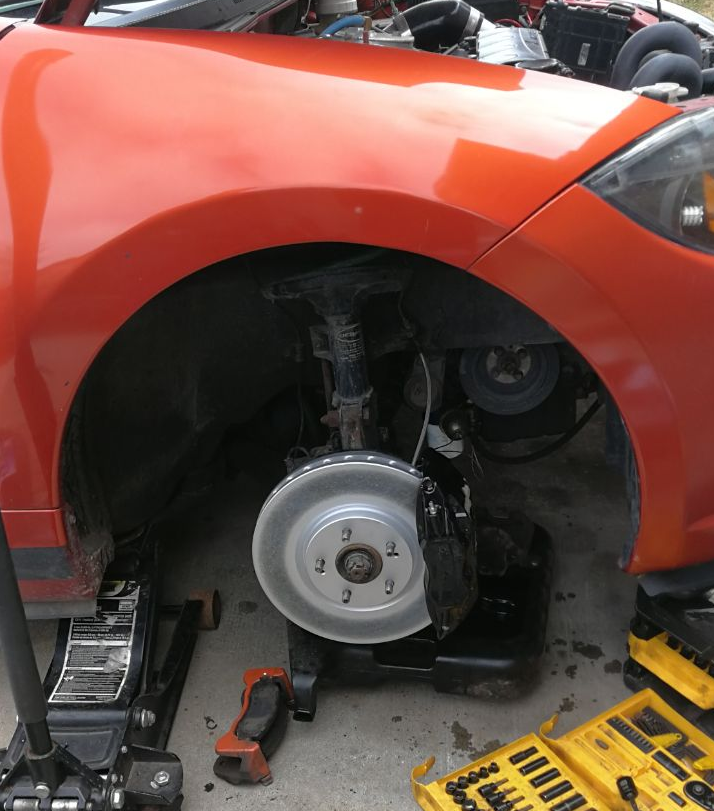
Step 5: Place your wheel on to check fitment. If the rim contacts the caliper while spinning, you will need to use wheel spacers. If you're clear, put on the wheel, place it on the ground, and torque it. Congratulations, you have an evo brake on.
Step 6:
Repeat the steps for the other 4 calipers, however, there are 2 small changes for the rear.
1: Evo hardware for the rear calipers is too long, and will contact the rotor as you're tightening it up. You will either need to cut the Evo hardware down to OEM length, buy OEM length bolts of the right thread, or use washers to make up for the extra length (it would be a lot of them). I opted to cut the Evo bolts down to OEM length. Be careful, as you can always cut them shorter, but can't cut them longer.
2: The rear dust shield will not clear the rotor, as it bends inward. You can either bend it back, or you can remove it. I chose to remove mine, as it was rusty, and of so little importance.
Once all assembled, you'll have something like this
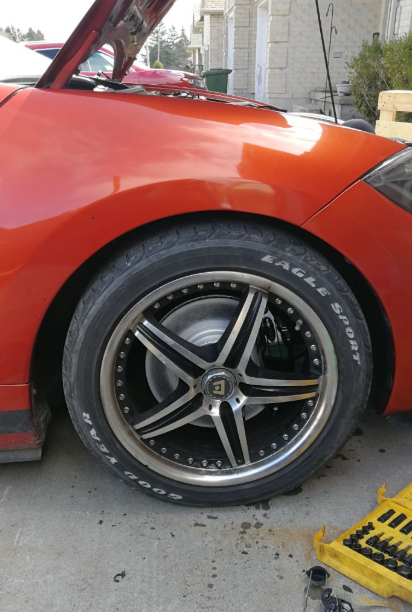
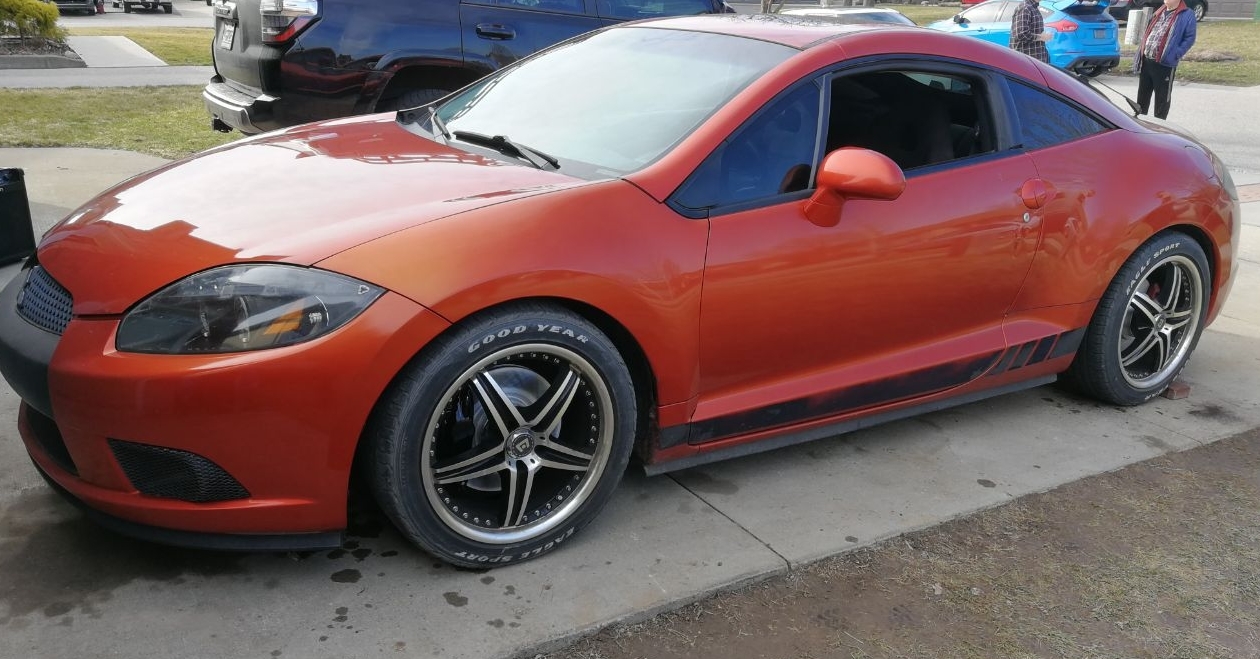
I initially used wheel spacers, but didn't like how they sat, and they rubbed on my fenders over train tracks. They have been since removed.
I hope this guide has been helpful
Here are stock rotors to compare to

Preface:
Why should you do this mod:
Larger brakes have more mass, and wider rotors have more cooling ability. If you find that the OEM brakes are overheating on the track, and it's NOT because of decade old DOT3 fluid boiling or low heat ceramic/organic pads being used, this is the mod for you. Alternatively, if you're willing to lose some performace in order to not have to change from ceramic pads to metallic for light track use, this will give you some extra braking ability as the brakes will take longer to heat up, and will cool much faster than OEM, especially for a GS
For a GS, this will add 10mm thickness and 20mm diameter to the front rotors, and 14mm thickness, 40mm diameter to the rear. This also converts the rears from solid rotors to vented rotors, resulting in significant cooling increases (as they have no cooling veins from the factory at all). GT will see slightly less gains from this, but will still see a significant jump
Why this mod may not be right for you:
If you're not tracking the car, you won't be at a point where this mod is worth the money, or the performance losses. Larger rotors add more unsprung rotational mass, which will stress your suspension and driveline components more, as well as will reduce the amount of horsepower you put down at the wheels. If you're fading your stock brake son the streets, you should probably cut back on your street racing. If you're not street racing, consider investing into non eBay rotors, and some good pads, and fix your brake issues. You may have a bad brake booster or severely swelled brake hoses. Stock brakes in good shape should be able to lock up the wheels at the end of the 1/4 mile without issue, and I have been able to at 180km/h at the track.
Advice on choosing your new pads/rotors:
-Be honest with yourself. If you're not gonna go to the track, you don't need carbon metallic pads. Everything that adds performance in this area typically takes away from comfort and safety on the streets, with a few exceptions.
-High heat rated pads usually don't work well until they see high heat, and typically make a lot of noise. Typically, these are very hard on rotors. I bought myself a set of ceramic for the streets, and carbon metallic for track days because of that.
-High heat rated rotors (high carbon) are a nice addition, but typically cost more. They provide higher thermal capacity (work longer under stress) and are more resistant to warping/cracking.
-Slotted rotors are a nice aesthetic touch. It's possible there's a tiny gain here through the Leidenfrost effect, where a layer of steam may develop at the brake pad, and the steam may reduce heat transfer between the pads and rotors, resulting in reduced braking ability. I don't have a definitive answer, but do know that gasses can be compressed, and there is a LOT of force involved on brake pads contacting the rotor. Some also argue it allows for a spot for liquid water to be wiped away, which again is plausible, but as the pad engages the surface, it too is wiping the water away. I opted for solid rotors, as they can be re-surfaced.
-Drilled rotors are not a benefit if you're looking to upgrade your brakes unless your brakes are oversized. This is the one rare spot where I'd suggest them for the streets. By having less mass and pad surface area, they will heat up faster, and clamp harder. This will get your pads up to temperature quicker, and will allow for the most consistent and predictable street braking. This is why drilled make so many appearances on entry level "performance" brakes, as they do in fact feel like they grab harder, because at first, they do. But if you're doing this mod, it's a lot of money to be spending to not gain anything but fill the rims with a beefier rotor. Issues in performance use are everything that makes them good for the streets. They heat up fast due to lower thermal capacity, and will begin to fade sooner. The holes also take away air velocity from the cooling veins, reducing cooling of the rotor. On top of that, it's very common to see cracks form in drilled rotors of any quality from the drilled holes, and they often will connect to each other. The reason is that they create a lower stress point, and as the metals expand and contract, it's the path of least resistance for a fracture to travel along the grain to. Running ceramic pads on a street car, you probably won't have this issue. Running anything high heat rated on the track, you'd best stay away from them and go either slotted or full face. You don't see many competition cars running drilled rotors without a specific purpose (usually in tuning the rotors for the specific track. Eg, one with a lot of cooling time between hard braking could use the reduced heat capacity in order to have a harder engagement when needed, but driven right may never overheat the brakes. These are also cars that at the end of a race session put on new rotors, however, so keep budgets of high end race teams vs your budget in mind, and decide from there). I ran these on the street without issue on ceramic pads. They only saw minimal abuse at the track, but were very prone to smoking the pads (overheating quickly) on hard braking
Alright, onto the installation.
Step 1a:
Assemble your brake calipers if they aren't already
The calipers are 2 pieces. I re-assembled mine with new seals, pistons, and dust covers. Be sure everything is clean, and use a lot of brake lubricant. You do not want to scratch the sides, as you may cause leaks, or to pull the seal inside out.

Connect the two halves of the caliper together, and connect your crossover line. Be sure to pay attention so that one caliper is built for each side with the crossover line on the bottom. These use 10mm fittings, and are a pipe thread. They will seal themselves once tight.
Apply your bleed nipples. They must be at the top, or else you can't bleed out air.
Place your brake pads in place, and connect them with the first pin. Then, place the separator under that pin, spreading the pads apart. You'll have to bend the separator down, and then place your second pin. I didn't take a picture of it, so here's a random one from evolutionm

The calipers are now ready to go on.
Step 1b:
Gather your materials
Calipers (front and rear)
Evo caliper bolts (front and rear)
Brake Pads
Brake Rotors
Wheel spacers (depending on your rims, not just offset. Mine are +45, 18*8.5", and still cleared)
Brake fluid (DOT 3, 4, or 5.1, these can be mixed, and are made from the same things. Do NOT use DOT 5, it's silicone based, and will ruin your ABS and you will probably crash from a brake failure)

Step 2:
Remove your wheels
Step 3:
Remove the factory brake calipers. You'll undo the slide pins at both the top and bottom of the caliper, remove it, then remove the caliper bracket, and the brake rotor.
You can undo the caliper at this point at the brake line. It's a 12 or 14mm headed banjo bolt, be sure to not lose the 2 crush washers (one per side of the brake hose fitting). Optimally, you'd use fresh ones. Leave the line hanging upwards so the brake lines don't fully drain.
You will NOT be needing any of the hardware from the front calipers.
Step 4:
Place the new rotor on, and bolt the caliper in place. The caliper will bolt in using the same holes the OEM caliper bracket did, but you will need to use the two Evo caliper bolts.
Connect the brake hose, and tighten everything up. It should be on, and ready to be bled.
For bleeding, have a friend press down on the brake pedal while you open up the bleeder nipple on the inner half of the caliper. Once the pedal is at the floor, close the bleeder, and have them raise the pedal. Repeat the process until no air remains in the first half, then do the other half. A clear piece of tubing placed over the bleeder outlet will allow you to see air bubbles in the fluid, and prevents air being sucked into the system if a mistake in coordination occurs.

Step 5: Place your wheel on to check fitment. If the rim contacts the caliper while spinning, you will need to use wheel spacers. If you're clear, put on the wheel, place it on the ground, and torque it. Congratulations, you have an evo brake on.
Step 6:
Repeat the steps for the other 4 calipers, however, there are 2 small changes for the rear.
1: Evo hardware for the rear calipers is too long, and will contact the rotor as you're tightening it up. You will either need to cut the Evo hardware down to OEM length, buy OEM length bolts of the right thread, or use washers to make up for the extra length (it would be a lot of them). I opted to cut the Evo bolts down to OEM length. Be careful, as you can always cut them shorter, but can't cut them longer.
2: The rear dust shield will not clear the rotor, as it bends inward. You can either bend it back, or you can remove it. I chose to remove mine, as it was rusty, and of so little importance.
Once all assembled, you'll have something like this


I initially used wheel spacers, but didn't like how they sat, and they rubbed on my fenders over train tracks. They have been since removed.
I hope this guide has been helpful
Here are stock rotors to compare to


